

WINGED WARRIORS/NBOA TECHNICAL PAGE
HOW TO RESTORE A NEW LOOK TO YOUR GAS TANK
text and photos by Sue George
For those of us who drive our old Mopars, a lot of components that are out of sight are also out of mind and don't get too much attention unless they break or otherwise cause problems that we are forced to deal with. Most of these cars have long ago seen their 30th birthdays, and at least that many years of road dirt and water, salt and sand, corrosion, etc. Take a look at your gas tank. It's likely one of the most neglected parts under the car and yet you can usually see it, at least partially, while the car is sitting on display at a show. In a weekend, you can get it cleaned up, restore it to a new appearance and even get those old gaskets replaced.
Of course the first step is to drain the tank and remove the fuel lines, filler neck, straps and the tank from the car. Very carefully remove the remains of your original gas tank pad (it will be squished between the top of the tank and the body) so you can use it later for a pattern if need be. Use a putty knife to scrape the majority of the road dirt and undercoating from the gas tank.
Then use "Pre" surface preparation part #10194ZP to finish cleaning the tank. It's available from the Eastwood Company and you'll want to get a quart can because it will take at least that much to do a good job. Gather up a big pile of clean rags that you can throw away. Soak a rag with Pre and wipe it vigorously over the tank surface, working in a small area at a time. When that rag is soiled, get a clean one. Don't re-wipe the tank with a dirty rag. The Pre will remove old paint, light undercoating, dirt, grease, road tar, but I'll warn you, it takes a lot of rubbing and you'll use a lot of rags. Take your time cleaning the tank and be very particular because it is absolutely necessary to have it spotlessly clean for the new finish to adhere. The quality of work you do here will make a big difference in the end result!
Even if you are starting with a brand new gas tank, it is necessary to clean it thoroughly with Pre first. The new tanks have a cosmoline-type preservative on them.
Use rubber gloves when working with Pre, to protect your hands because it's a very strong chemical. Use a clean pair of cotton gloves when handling the clean tank also to avoid getting any fingerprints on the tank. Skin oils will also keep the new finish from adhering so don't handle the tank with bare hands.
When you have completely cleaned all of the tank's surfaces, it should be extremely shiny and dark metal colored as shown below. There should be no dull places, film or any residue anywhere on it. Let the tank sit for a while where it will stay dry and very clean. Don't forget to clean the gas tank filler tube and straps also.
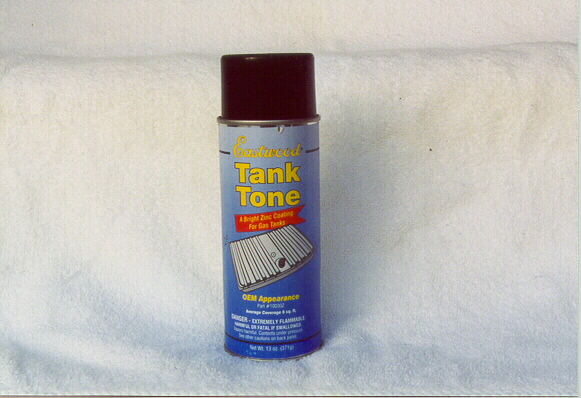
Next you'll apply "Tank Tone" part #10030Z, also available from the Eastwood Company. This is real zinc coating which will prevent rust, and the can says it even works over the top of very minor surface rust. Of course, if you're going to the trouble of restoring the tank, you'd want to remove all surface rust with sandpaper or whatever before ever using the Pre.
You'll need two 13 ounce cans. One of the cans I received had no compressed air left, so check your cans right away when you receive the product before starting your restoration! The zinc spray is strange stuff to work with. When you spray it, it seems to mostly disperse into the air and very little of it ends up on the tank (which is probably why they recommend two cans). You'll see a coating of metallic dust all over everything when you're done, so cover a very large area with paper or plastic! Apply the Tank Tone to the tank in several medium heavy coats. Let it sit and dry for at least a day before turning it over to paint the other side.
Again, don't touch the tank with bare hands to turn it over or move it. Use clean cotton gloves. Since this finish is zinc, there will be some loose metallic dust when you handle the tank, especially when you re-install it in the car. Unless you do gas tank installation for a living and are really good at it, you'll encounter some scratches in the new finish when you put the tank back under your car. The zinc coating is a very forgiving finish, so you can easily touch it up if you reserved a little bit of Tank Tone.
You can also preserve and seal the inside of your tank with a kit from Eastwood, but you'll need to do this before prepping and finishing the outside of the tank. This is probably not necessary unless the car has a history of sitting outside where it could have collected moisture and was not driven for many years. We pulled the original 34-year-old tank off of our '69 Daytona and it still looked like brand new inside. You can look inside the tank and see if there's rust. If so, I'd recommend sealing it or replacing it with a new tank. Most of the tanks are still available right from Chrysler and many restoration parts vendors.
Now that you have the new finish sprayed on, let it sit for a day or two in a very dry clean place to set up. In the meantime, you can make a new gas tank pad for it if you haven't already purchased one. Use black roofing tar paper which you can buy at the lumberyard in a roll (it's cheap) or you can usually talk a local contractor into giving you a left-over piece of it as most of them have some partial rolls.
If you were able to salvage any of your old pad, use it as a pattern to cut out the new pad.
If you decide to buy a reproduction pad from a parts vendor, DON'T buy the pads made of foam that some vendors offer. These will hold moisture and eventually will rot out the trunk floor of your car! The original pads were NOT made of foam! If you were not able to save your old pad and don't have a pattern, you can purchase a new pad, correctly made out of the black tar paper material from Performance Car Graphics, 723 Shannon Street, Tallahassee, FL 32305 or call (850) 878-1450. The 1968-70 B-Body pads are priced at $5 each and the 1962-67 B-Body pads are $10. Add $7 shipping.
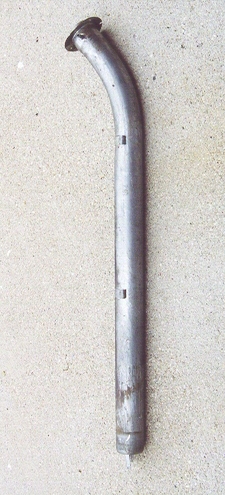
You also need to replace all of the gas tank-to-filler neck and filler-neck-to-body seals now. Reproductions of these various seals are available in correct material from Year One. For the Daytona gas tank we worked on, we replaced the body-to-filler tube seal and filler-neck-to-trunk floor seal. As you can see in the photos below, the old seals on the right side of each photo had decomposed badly with age; the new seals are shown on the left side of each photo.


One more thing you'll want to do while the tank is still out of the car: clean the trunk floor under the car and apply a rust-extender product to the surface and repaint it. This will protect the floor from further rusting after your restored tank is re-installed.
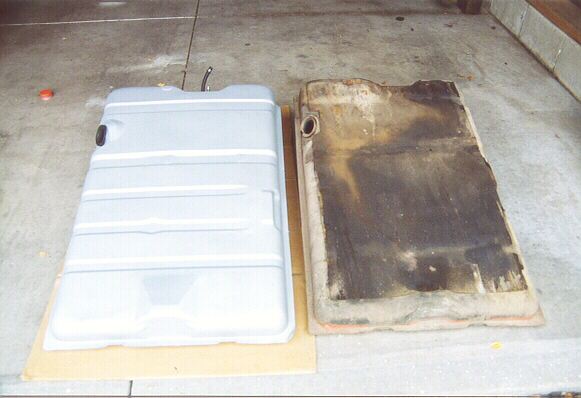
A little tip for anyone performing this job on a Charger: when you get ready to replace the three screws in the chrome fuel cap bezel on top of the fender, either tape across the filler tube hole with masking tape or jam a wad of rags down there. The first thing that's going to happen is you'll fumble one of those screws down the filler tube. I can tell you from experience, it's no picnic to retrieve the screws from the depths of the gas tank once they drop down the filler tube!! To add insult, the screws are stainless so a magnet will not get them! Shown below is the front and rear view of the crusty original gas tank with the original pad still on it, next to the restored tank.

Total cost of materials and parts to refinish our Daytona's gas
tank (in 2004): approximately $10 for one quart of Pre and approximately
$16 for two cans of Tank Tone from the Eastwood Company; fuel neck seal,
tank filler tube seal and body-to-filler tube seal were approximately $40 for
all from Year One; the roofing tar paper for the trunk pad cost us nothing. End
result (as they say in the commercials): Priceless. Obviously this article is
not intended for anyone doing a concours restoration. It's for those of you who
drive and enjoy your Mopars and want to display them in weekend car shows or
cruises.
| MAIN PAGE | TABLE OF CONTENTS |