


WINGED WARRIORS/NATIONAL B-BODY OWNERS ASSOCIATION
PICTORIAL STUDY OF 1969 DAYTONA CHARGER DETAILS
Photos by Frank Badalson; Text by David Patik
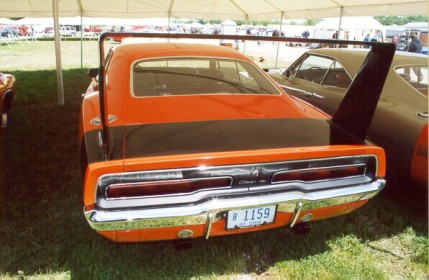
These are photos from Daytona #XX29L9B356530. It was built as a Charger R/T on April 27, 1969 as order number 926058. It is an all-original car with 6,689 actual miles on it.
The photos shown below, from left to right:
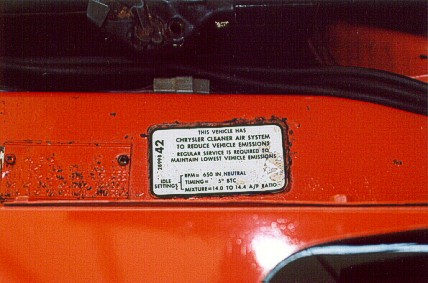
(1) This is a photo of the MSO = Manufacturer's Statement of Origin. This is the birth certificate of the car. If you trace your car back to the state in which it was sold new, and the state kept all data in its files, you may be able to obtain your MSO (for any car). Note these interesting details on the MSO: "3573" is written by hand on the upper right corner. This was also written by hand on the car's window sticker. The VIN is wrong! Notice it shows XS29 instead of XX29. The model is Charger R/T--instead of Daytona. It's hard to get a state title office to correct a title when even the MSO is wrong. The shipping weight is shown as 3,535 pounds. Has anyone ever weighed a 440 Daytona? The transfer date from Chrysler to the Dodge dealer was 06-30-69.
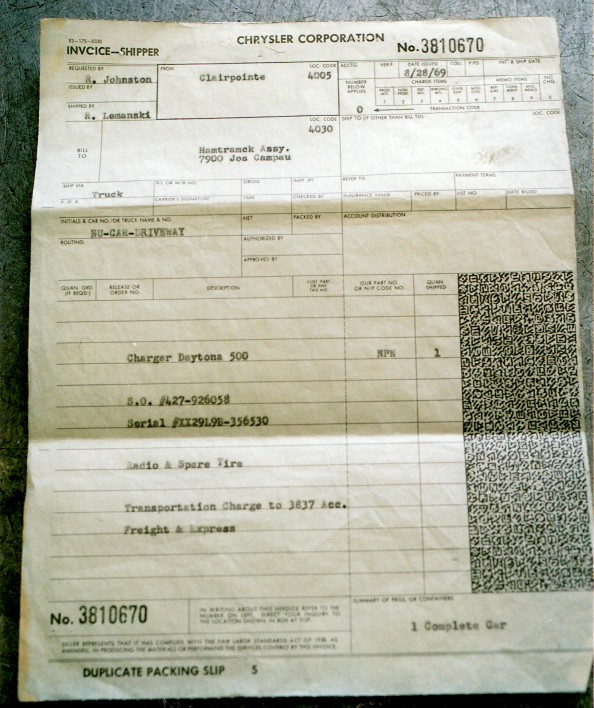
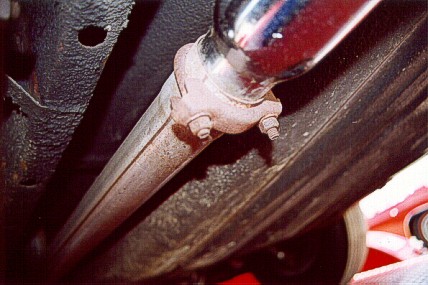
(2) This is a photo of the Shipper Invoice. Notice these details on the invoice: In the lower right corner, the summary of freight on container is "1 Complete Car". The shipping date is 8-28-69. This shipping invoice shows the car was shipped from Clairpointe, the assembly line training facility (NOT Creative Industries), so the Daytona must have been hauled via truck from Creative when the conversion was finished to Clairpointe via NU-CAR-DRIVEWAY Trucking Company.
(3) This is the Window Sticker. Notice the appearance of the handwritten "3573" again. This Daytona shipped to Winter Park Dodge in Florida. The shipping charges were $107.00!! The total price of this car with shipping was $3,951.07. Bob McCurrey who was Chief of Dodge, told us that each street Daytona cost Chrysler $10,000 to build and convert to a Daytona! No wonder they were rushed through designing and building before the accountants even knew they existed! Note that the car's VIN is correct here. The production date and order number appears on the window sticker, as it also does on the broadcast sheet and fender tag. I wonder what the charge of $254.95 is for at the bottom of the column above "total"?
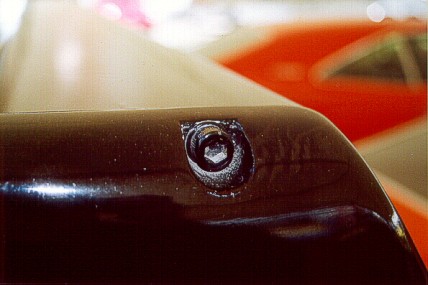
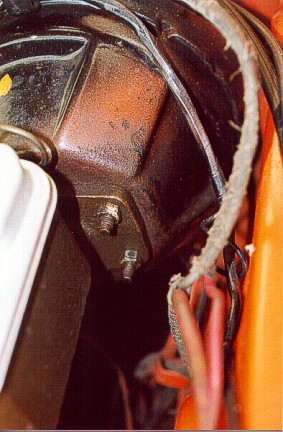
(4) This is the engine block VIN stamping. It is located on the right side (passenger's side) of the engine block, just above the oil pan, near the front. Note that only "9B356530" is stamped into the block. Some cars have the complete VIN stamped in their blocks. The stamping of the VIN is done after the engine was painted new. The engines were painted after basic assembly at the engine plant, and the plant had no idea what car they would be used in. The stamping of this VIN on the engine was likely done in Engine Dress Up area, when drivetrains were properly sequenced with the bodies.
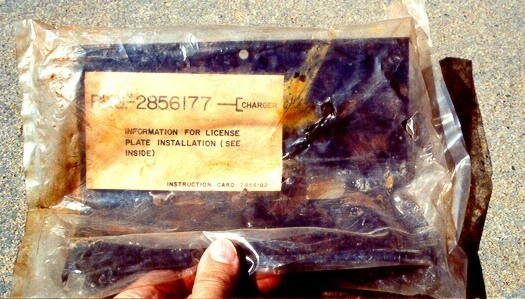
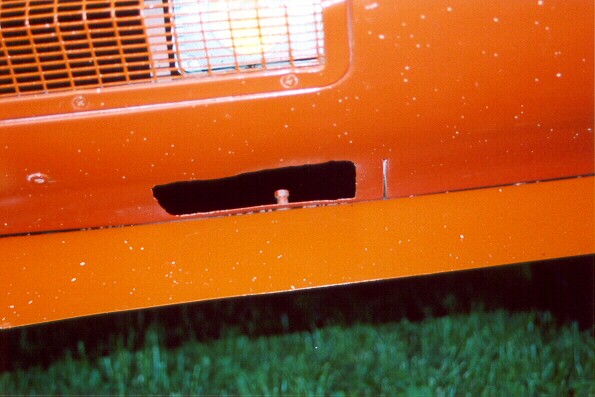
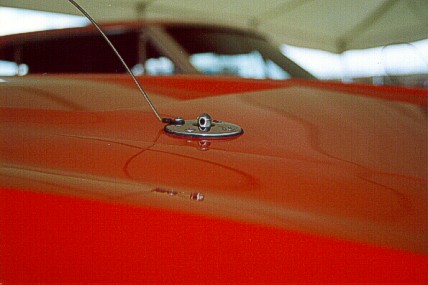
(5) This is a photo of the front license plate mounting bracket. This is an original new one still in the original plastic wrapper. These were never installed on the underside of the nosecone at the factory and that is true for all Daytonas. The part number is #2856177 and it is for a Charger. It is not a special Daytona piece.
Photos below, from left to right:
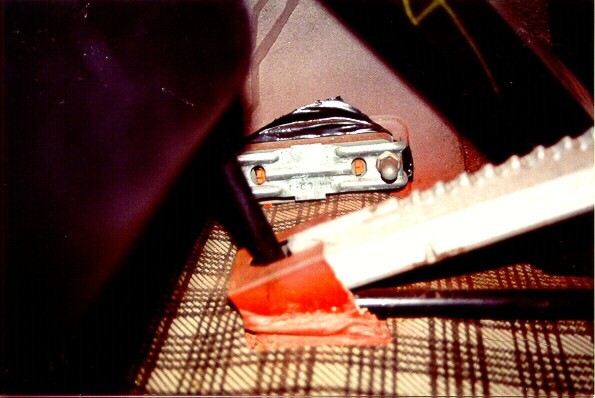
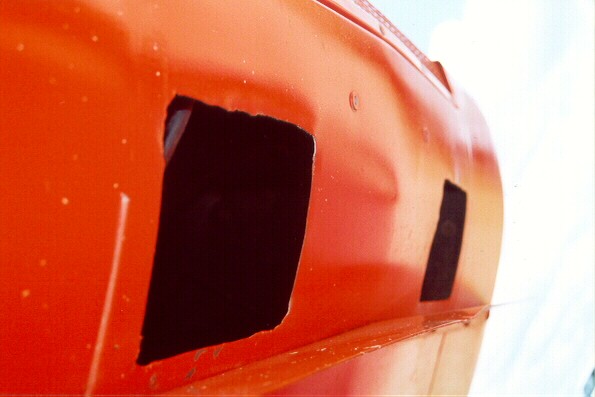
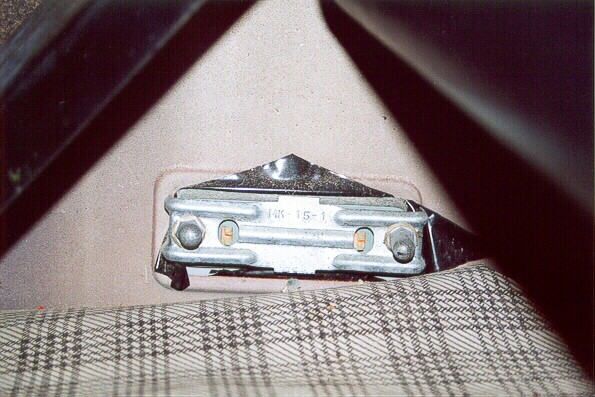
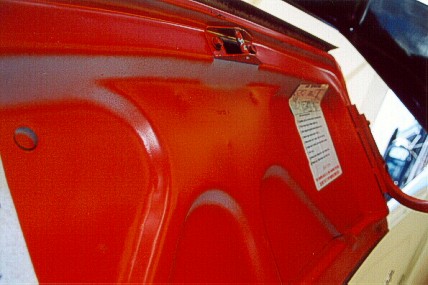
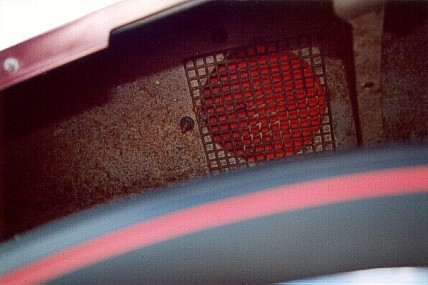
(6) This is looking inside the trunk at the left side marker reflector adapter plate. Note that the black tape stripe has been X-cut and the material was just pushed into the quarter panel hole. Then the reflector was installed. The stripe material was not cut off. This car had the short arm on the lug nut wrench, not the long version sometimes seen on Chrysler cars. Minimal color coating was found on the inside of the quarter panel around the reflector area. No color overspray was seen here on the reflector mounting bracket, but it would have been installed prior to color coating when the car was built as a Charger R/T.
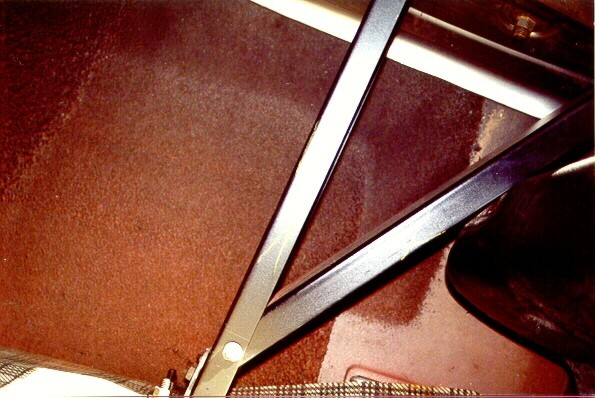
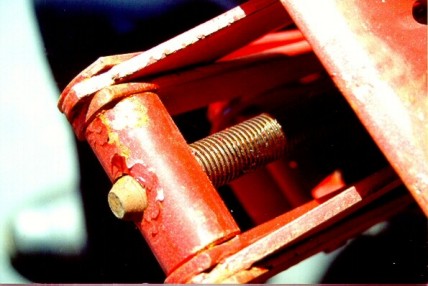
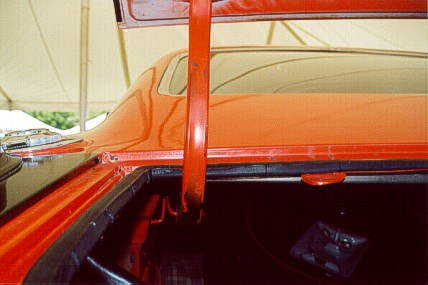
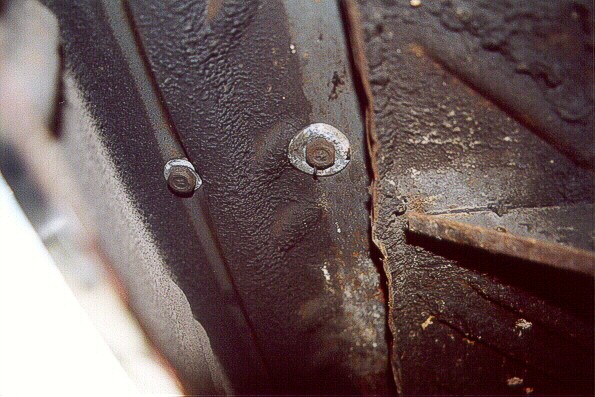
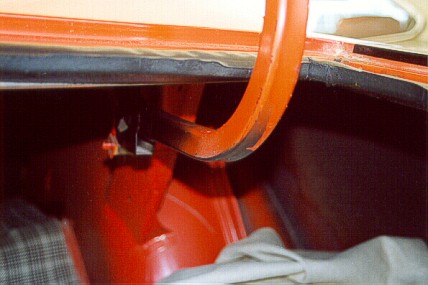
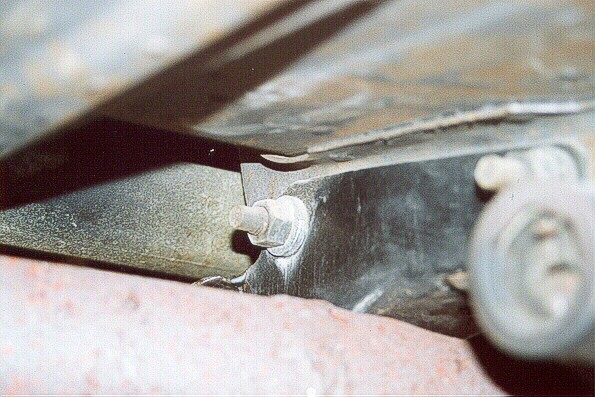
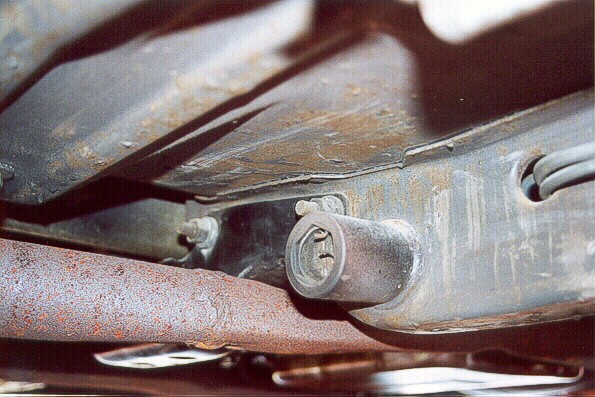
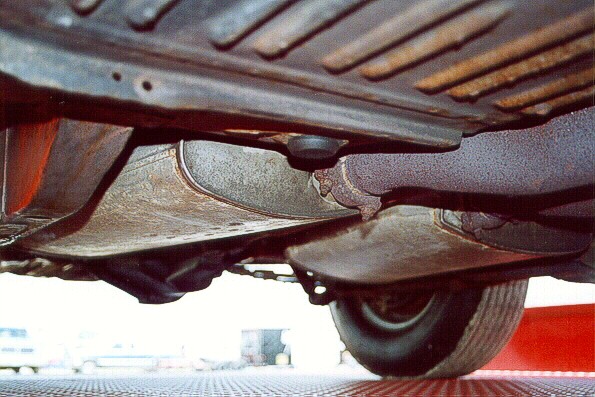
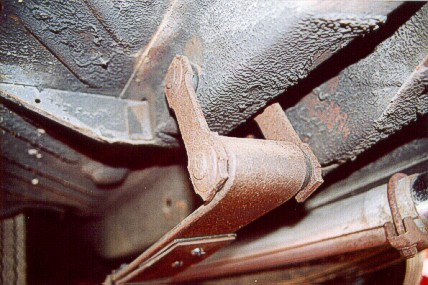
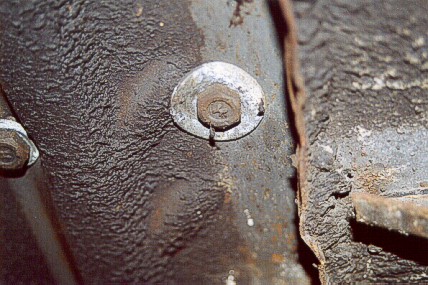
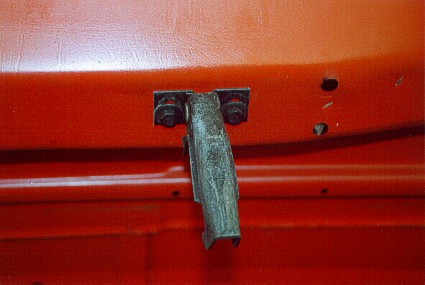
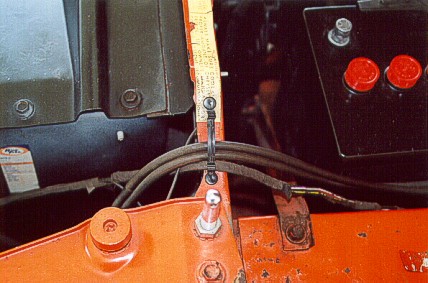
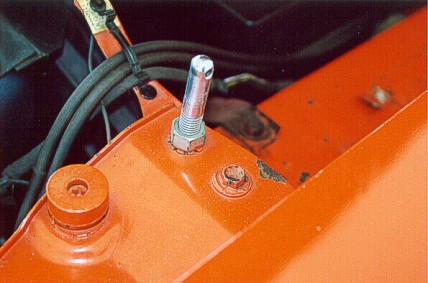
(7) This is looking inside the trunk up at the passenger's side wing reinforcement plate and wing forward brace. Not that there is almost no rust on the reinforcement plate, and no primer or color paint. The nuts that fasten the wing upright studs are the same as the nuts that hold the leaf spring front hangers to the frame.
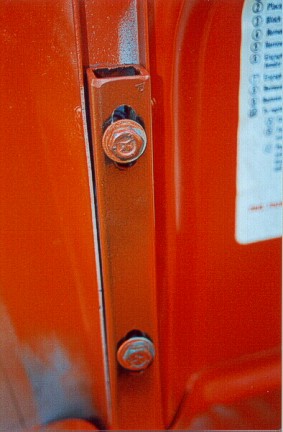
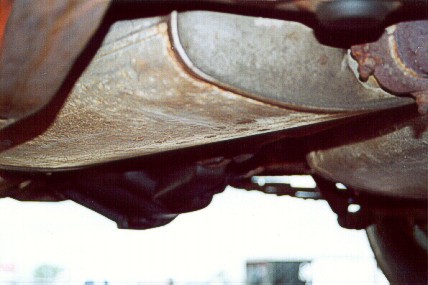
(8) This is looking inside the trunk at the right side wing brace. Note that the correct finish on the black braces is flat-to-satin black over bare metal. The hardware used to fasten the brace uprights together is 1/4" x 20 bolts and nuts with removable split washers. Note the sound deadener spray pattern on the inside of the quarter panel. It is sprayed on at the stamping plant where the quarter panels are made. It is sprayed over bare sheet metal. No sound deadener was sprayed on the rear reflector hole. There is minor color overspray on the inner quarter area.
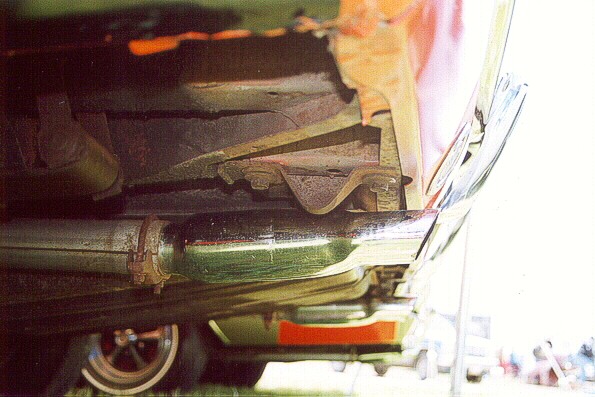
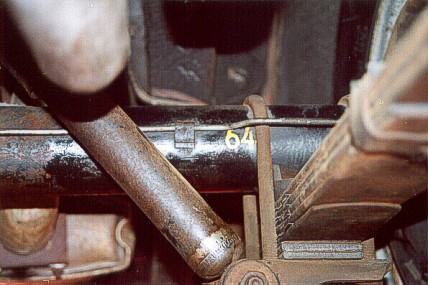
(9) This photo is looking inside the trunk at the right side wing brace. Note the yellow crayon markings on the wing brace. The rear brace fits inside of the bottom of the forward brace. The floor adapter plate sits on top of the trunk mat. The bolts to attach the floor plate to the forward brace pass through from front-to-rear. The bolts that attach the floor plate pass through from under the trunk floor and then nuts are put on inside of the trunk. Note the correct tan color of the trunk floor mat, with the correct print pattern.
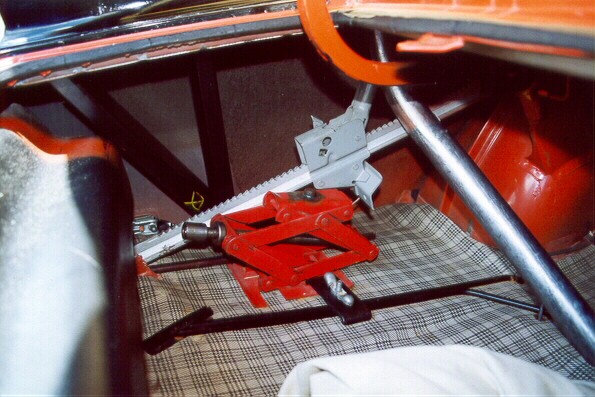
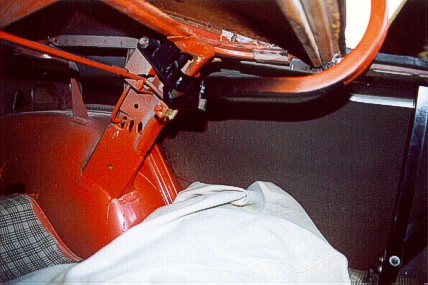
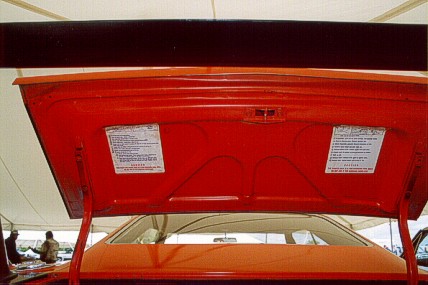
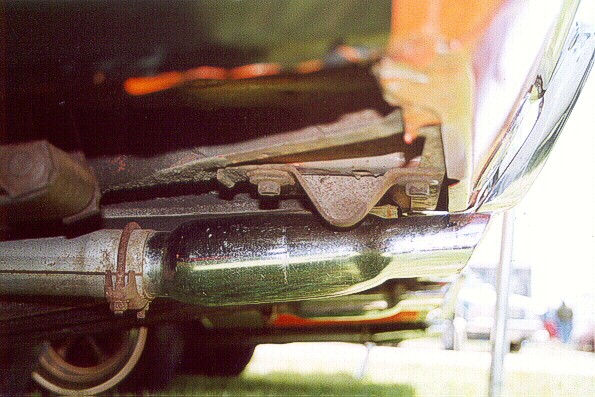
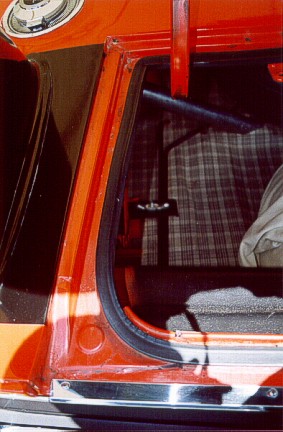
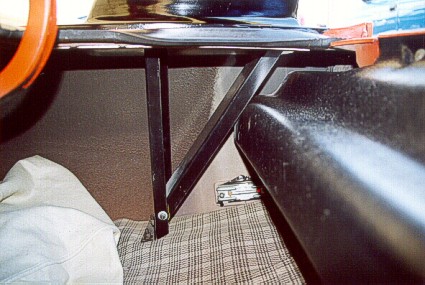
(10 & 11) These two photos are looking inside of the trunk at the left side wing brace and the jack storage bracket. Note that there is no color overspray visible on these parts. The fastback area and underside of the short decklid were all painted color before the wing and braces were installed. The jack post teeth are up when the jack stand is in storage. We don't know yet what the meaning of the yellow crayon markings on the wing braces is. The inside rear of the quarter panel shows dip primer runs. This is left-over from when the car, as a regular Charger, went through the dark grey dip primer. This dip primer was washed off the outer body, using water. These primer runs inside the quarter panel are from the water wash leakage from the outer body.


Photos below from left to right:
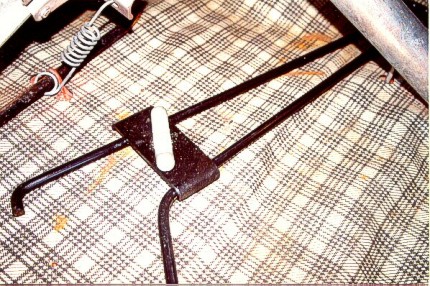
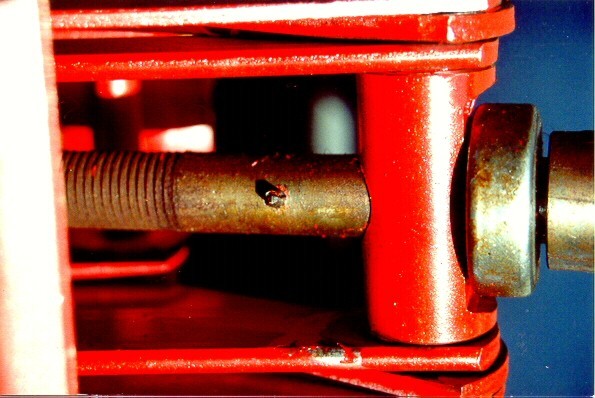
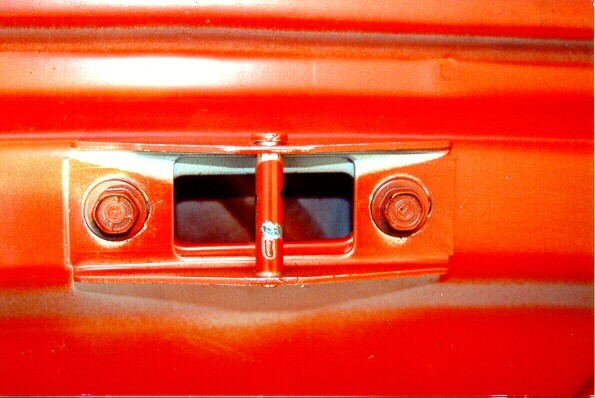
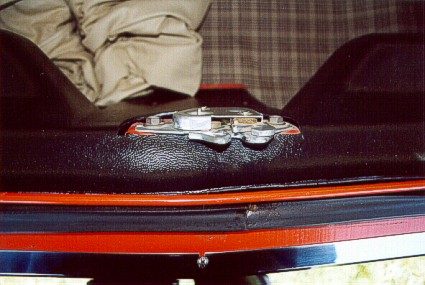
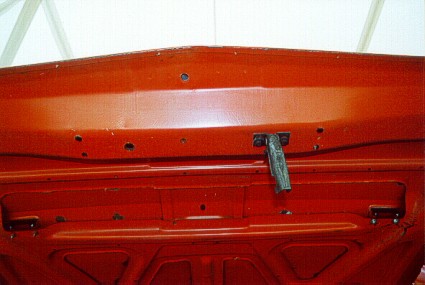
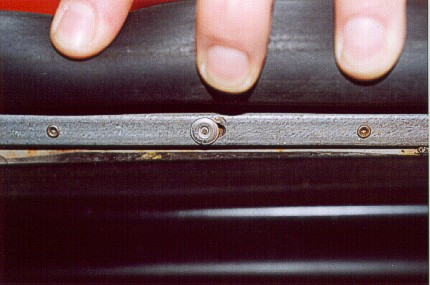
(12) This shows the inside of the trunk floor. This is the correct hold-down bracket. It holds down the scissor jack and jack handle. The scissor jack would be placed between the hold-down bracket and the hold-down spring of the rear jack. Note that the lug wrench passes through the hole of the hold-down spring, which is behind the floor loop. A standard wing nut is used to fasten the scissor jack hold-down bracket. It's the same as the spare tire/wheel wing nut. Note the shape of the scissor jack handle.
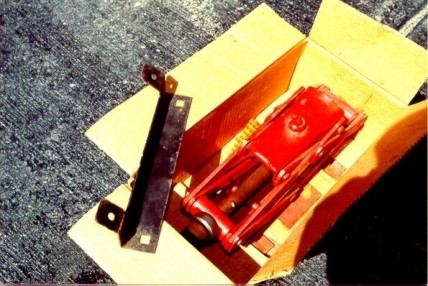
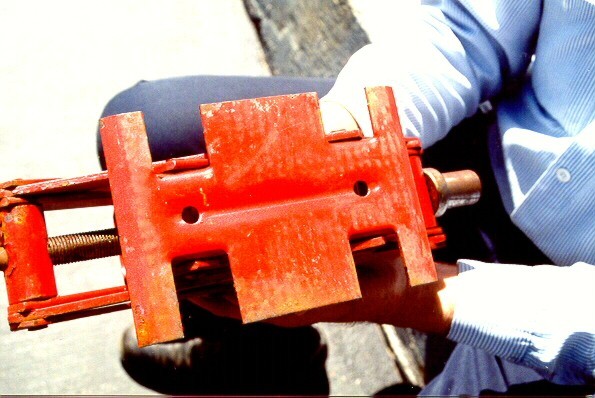
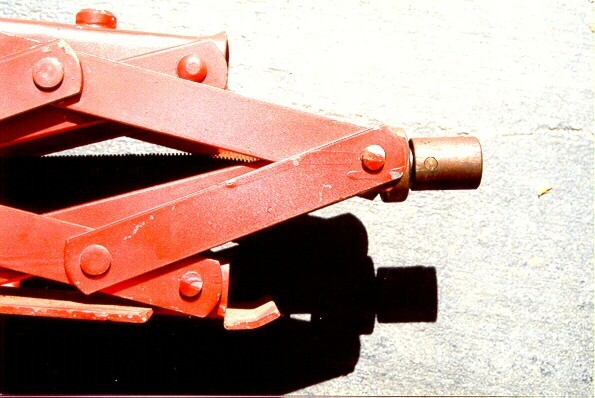
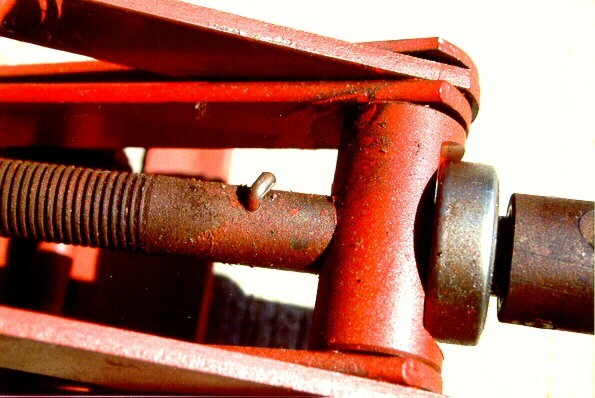
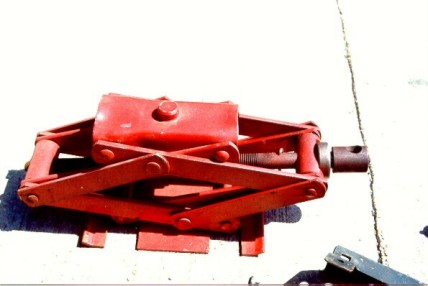
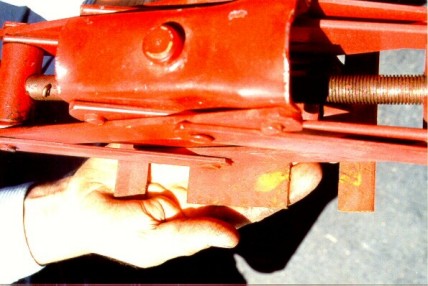
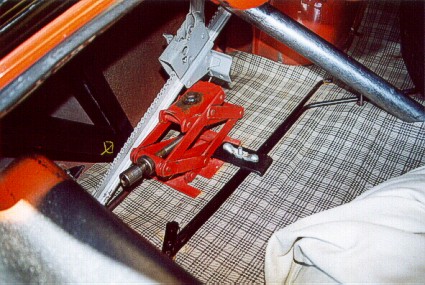
(13 through 22) This is the scissor jack in the original box, with the front license plate mounting bracket sitting on the box. This is the correct all-red Daytona front jack. The color is basic "red", not orange-red or black. Superbird front jacks are black. Note that the jack screw, bearing, handle receptacle, are NOT red. The jack was fully assembled when painted, minus those parts. The Daytona scissor jack was known to be made at Custer Manufacturing Company. This is known from factory paperwork and blueprints, not found with this car.


Photos below from left to right:
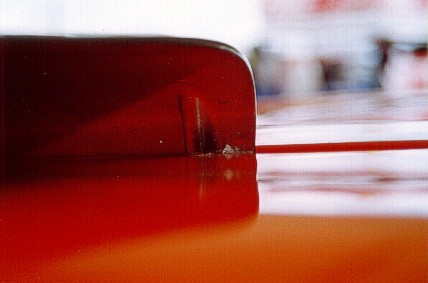
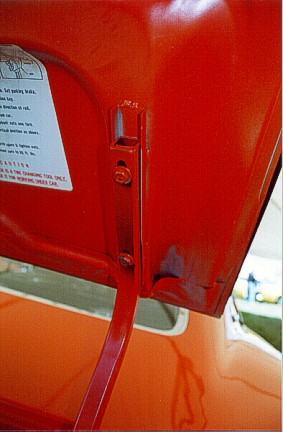
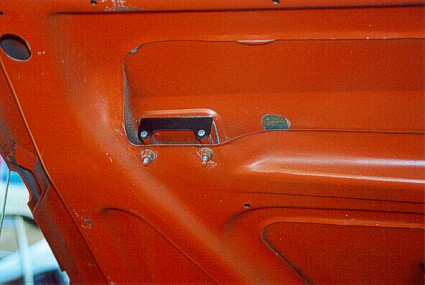
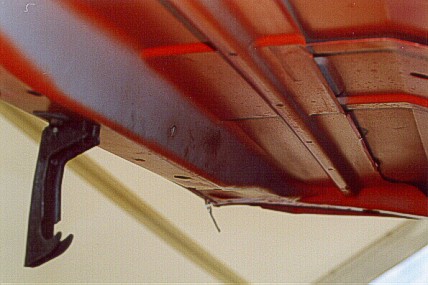
(23) This is the deck lid latch. This part was definitely not installed when the Charger body was painted the first time, however, there was no reason for assembly line workers to remove it when the fastback area was color-coated after the Daytona conversion. It appears there is color paint residue on the bolt heads possibly from the assembly line socket wrench. There is no color overspray on the taillight cover. It definitely was not installed when the car was first painted as a Charger. Likely it was removed during the painting after the fastback conversion. The mounting bolts have captive washers.
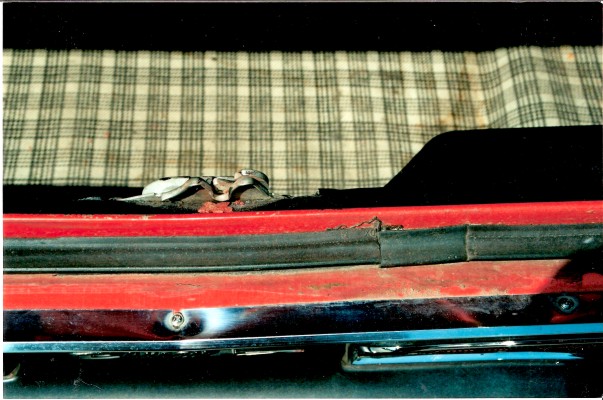
(24) This is looking at the rear of the trunk opening. The deck lid seal seems to be spliced twice on the right center. In fact, the short piece seems to be installed backwards or upside down!
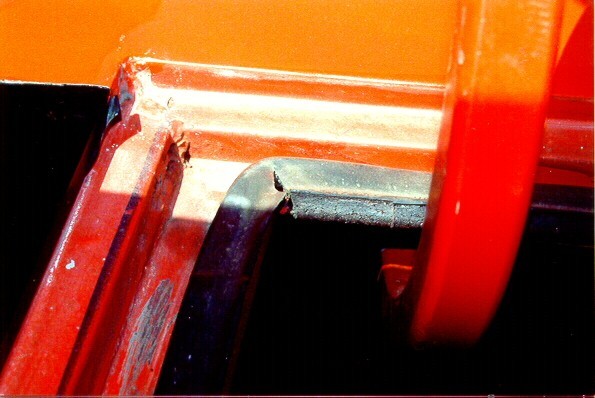
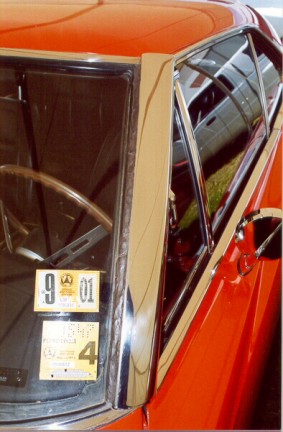
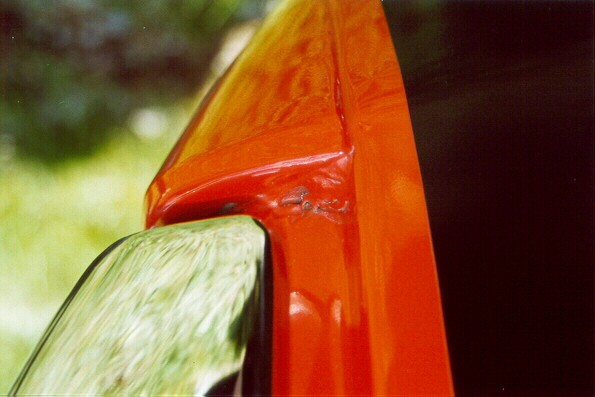
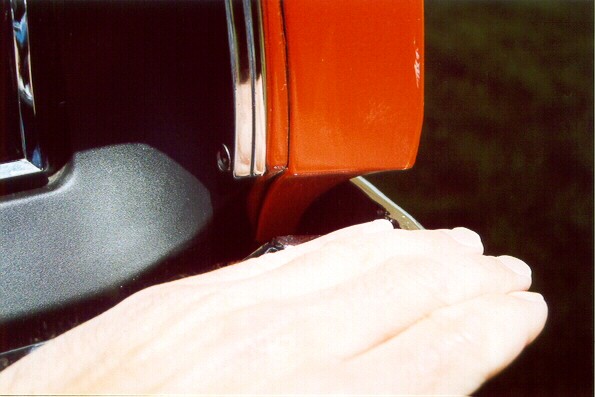
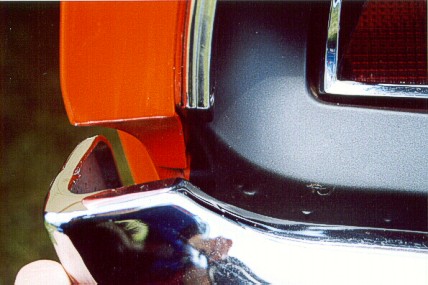
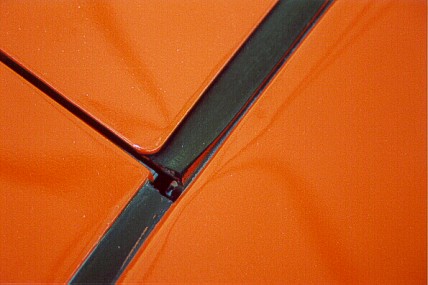
(25) This is a shot of the front left side of the deck lid opening. The original Charger deck lid rubber gasket is cut partially through in the corner, NOT completely cut through. The rear of the gasket remained on the deck opening flange out of the area of the fastback conversion. After the conversion was done, weatherstrip adhesive was used to reattach it to the newly-installed flange area of the fastback. Note that the edge of the bumblebee stripe wraps around. Note also that there is some kind of sealant in the corner where the fastback meets the quarter panel.
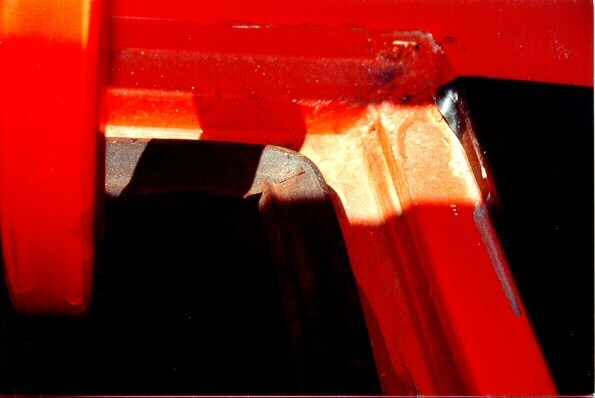
(26) Looking at the front right side of the deck lid opening.
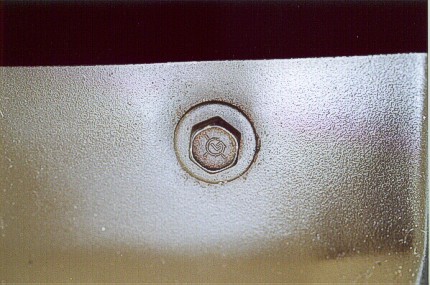
(27) This is the deck lid catch. Light grey primer shows where this area was not color coated to the front of the catch or to the front of the rib on the deck lid! Note how light the primer is, compared to the dark grey dip primer seen under the car and on the inside of the quarter panels. Bolts have captive washers and are painted. The catch was not used from the original Charger deck lid as it wouldn't have had light grey primer.

Photos below from left to right:
(28) This is looking at the right side quarter panel top. Note the length of the stripe where it wraps around the edge of the quarter. There is color overspray on the deck lid weatherstrip. This weatherstrip was NOT removed for color coating of the fastback area. Obviously, it was not well covered here! When the newly-installed fastback area was installed and painted, the top sides only of the quarter panels were color coated. Paint was ground off the area where the wing reinforcement plates were spot welded to the underside of the deck opening rain gutter. This area was painted, with the weatherstrip having been peeled off to facilitate this work.
(29) This is the screw that was used to attach the deck opening upper rear chrome trim. It is chromed, with a built-in lip, and is a very short screw. It is standard to all Chargers. No color paint was found on the trim or the screw.
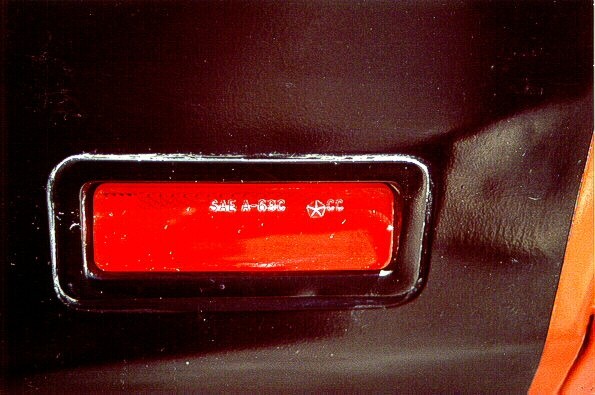
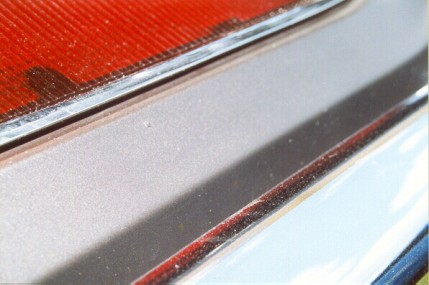
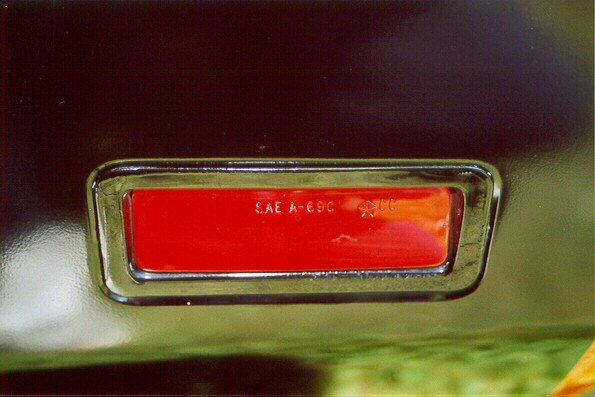
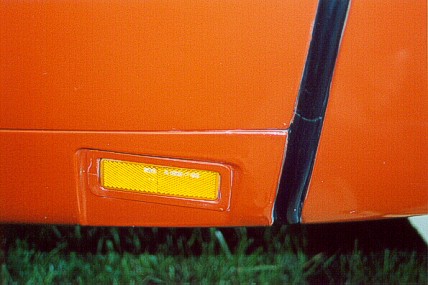
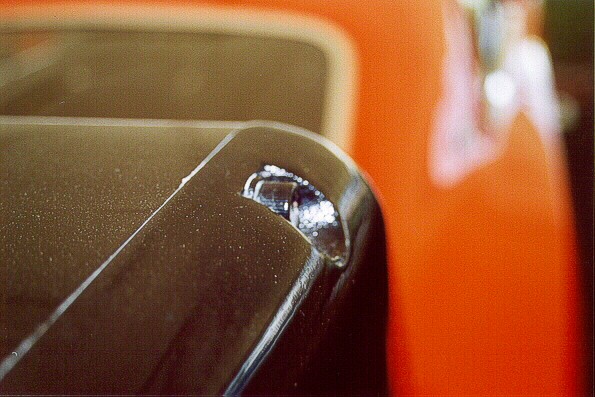
(30) The left side rear marker reflector frame is the color of the stripe--NEVER the color of the car. Removal of paint from the reflector frame usually shows a different color underneath! This is the color of the car body. As with any car in 1969, the marker reflector frame and its gasket were installed after the outer body was primed and baked on, but before the car was color coated. This means that the gasket outer edge will have color coat on it. The lens will not be colored, because it was not installed until after the color coat was baked on. The lens would not have survived the heat of the baking oven. This rear marker lens appears to have four "segments" or "angles of reflection". It is not known if there is any correlation of a four-segment or a two-segment lens and being a Daytona.
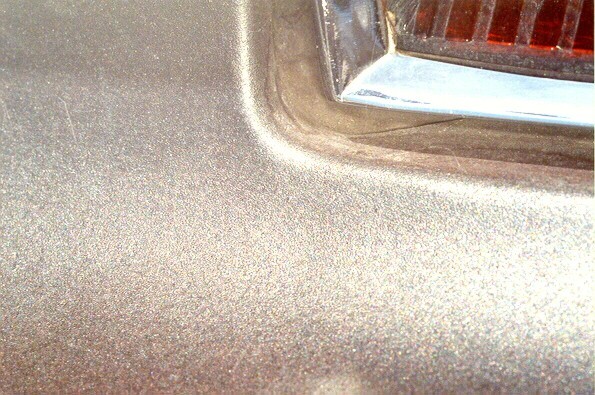
(31) This is looking inside the lower left corner of the right taillight and the surrounding taillight panel. The correct color is Black Organisol DDL9355 Ditzler. You can buy it from Totally Auto. This paint is a textured satin black lacquer. It is NOT just a flat, smooth black. The taillight paint was applied after the body color was applied.
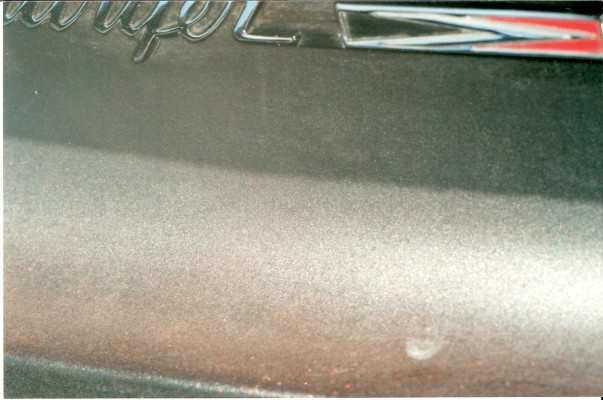
(32) This is looking at the taillight panel showing the Charger emblem and the arrow. All Chargers 500s and Daytonas were coded "V88" which means "delete normal tape striping and R/T emblems on quarters and taillight panels. However, a few cars did leave Creative Industries with the R/T on the taillight panel and a few cars have leaded-over holes in the quarter panels where R/T emblems were mistakenly placed when the car was built as a Charger! ALL Charger 500s and Daytonas were built as earmarked cars for conversion. They were NOT just regular Charger R/T cars randomly selected to be converted.


Photos shown below left to right:
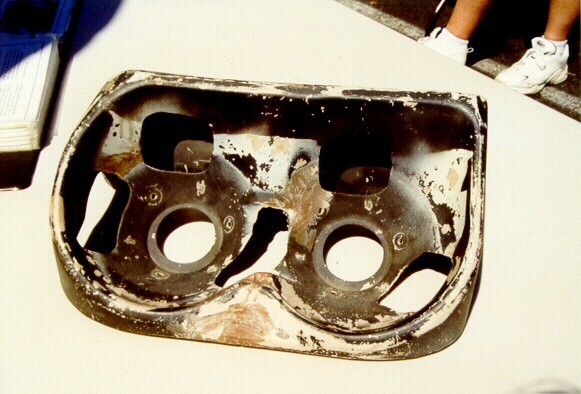
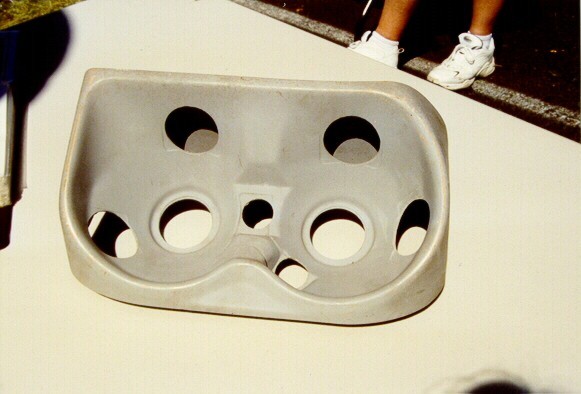
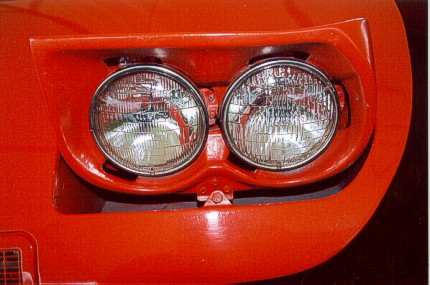
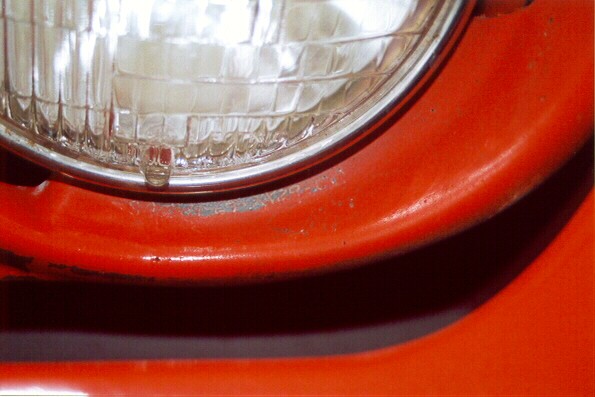
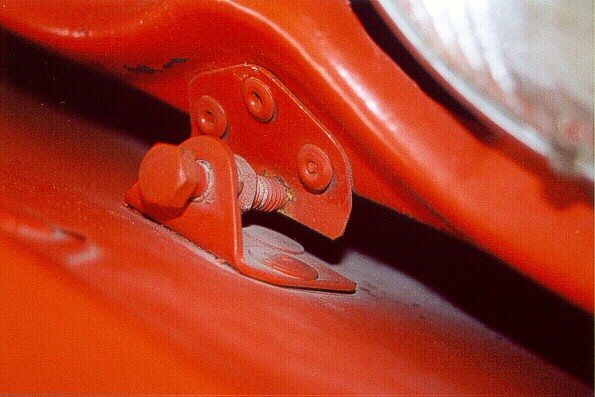
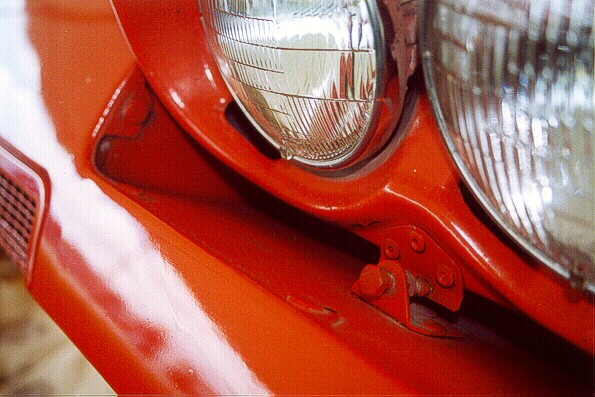
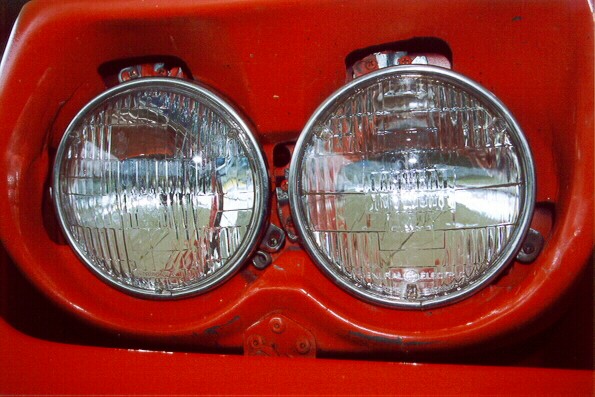
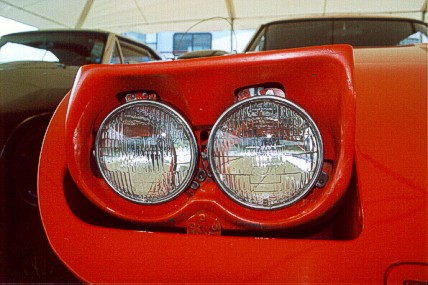
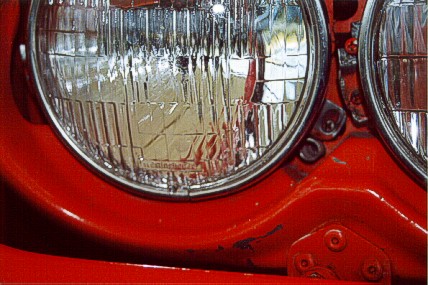
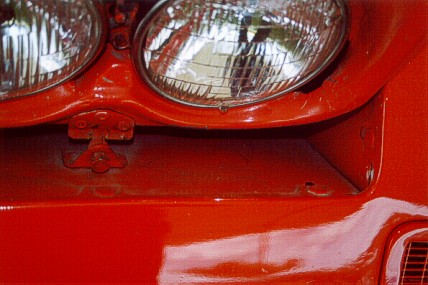
(33 and 34) These two photos compare the original headlight bracket (left) to the reproduction headlight bracket (right).
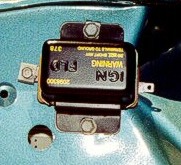
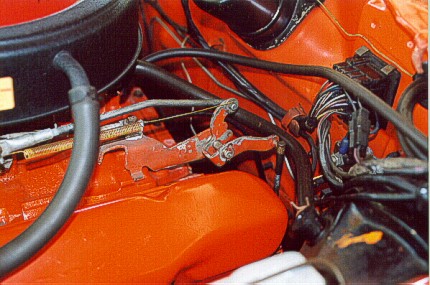
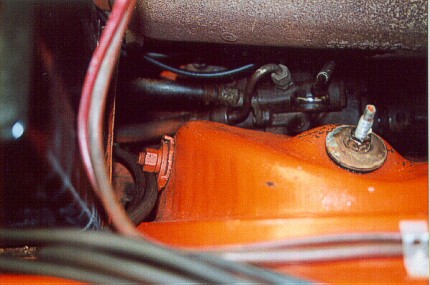
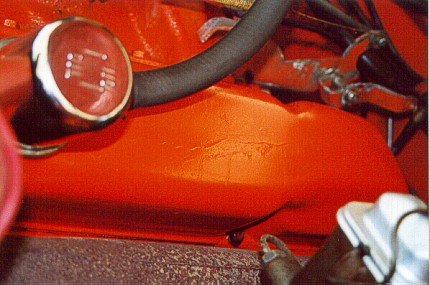
(35) This is the original Chrysler 1969 voltage regulator with correct yellow lettering. It was always mounted upside down like this.
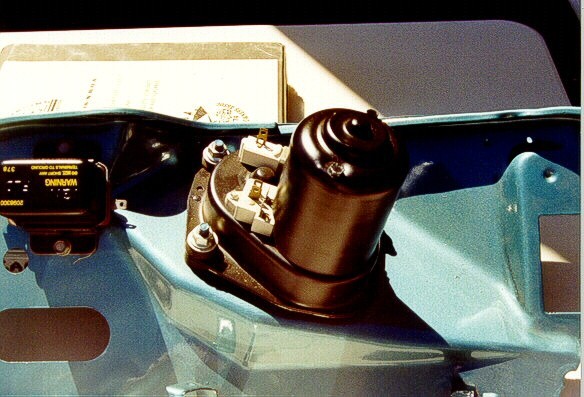
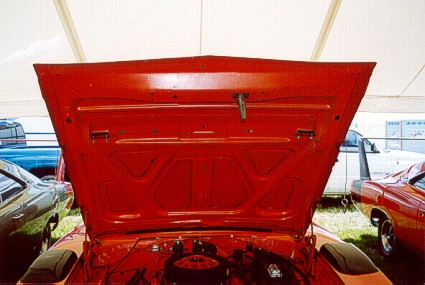
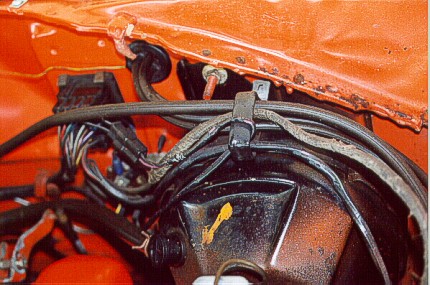
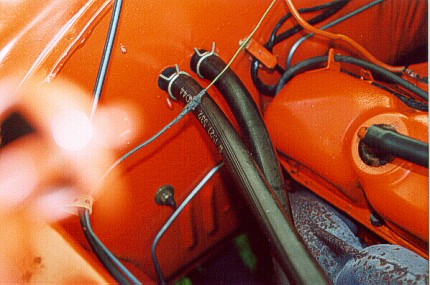
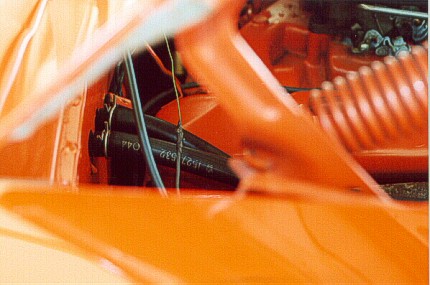
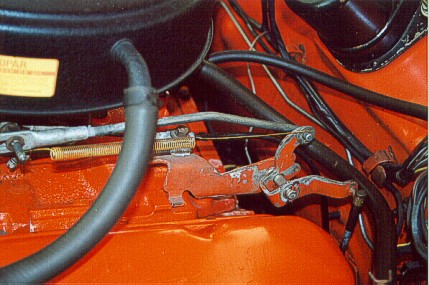
(36) The original 2-speed wiper motor stuck out from the firewall as shown here. All 1970 Sixpack cars were required to have the 3-speed wiper option because this wiper motor would not fit behind the oval air cleaner! The 3-speed wiper motor fits parallel to the firewall.
Following are more photos that Frank Badalson took of various details on this all-original low mileage Daytona:


| MAIN PAGE | TABLE OF CONTENTS |